Hosting Server at Home Using Dynamic IP
Introduction
To host a server, usually we have to use a static IP for the sake of the stable connections between the server and the client. However, sometimes we just want to host a web server temporarily. This can be a “private” game server or a “private” web chat room. Although dynamic IP is supposed to change without any notification, it does not change very frequently. This means that we can host our server using dynamic IP perfectly at home.
In this blog post, I would like to quickly show how to host a web server on an arm64 device at home using dynamic IP and port forwarding.
Example
Start Web Server
To start a simple web server, we launch a hello-world server from NGINX using Docker container.
1 | $ git clone https://github.com/leimao/NGINX-Demos.git |
Once the Docker container has started, we go to localhost:53729 to verify if the web server has started correctly. The following logo and similar information should show up in the browser.

Port Forwarding
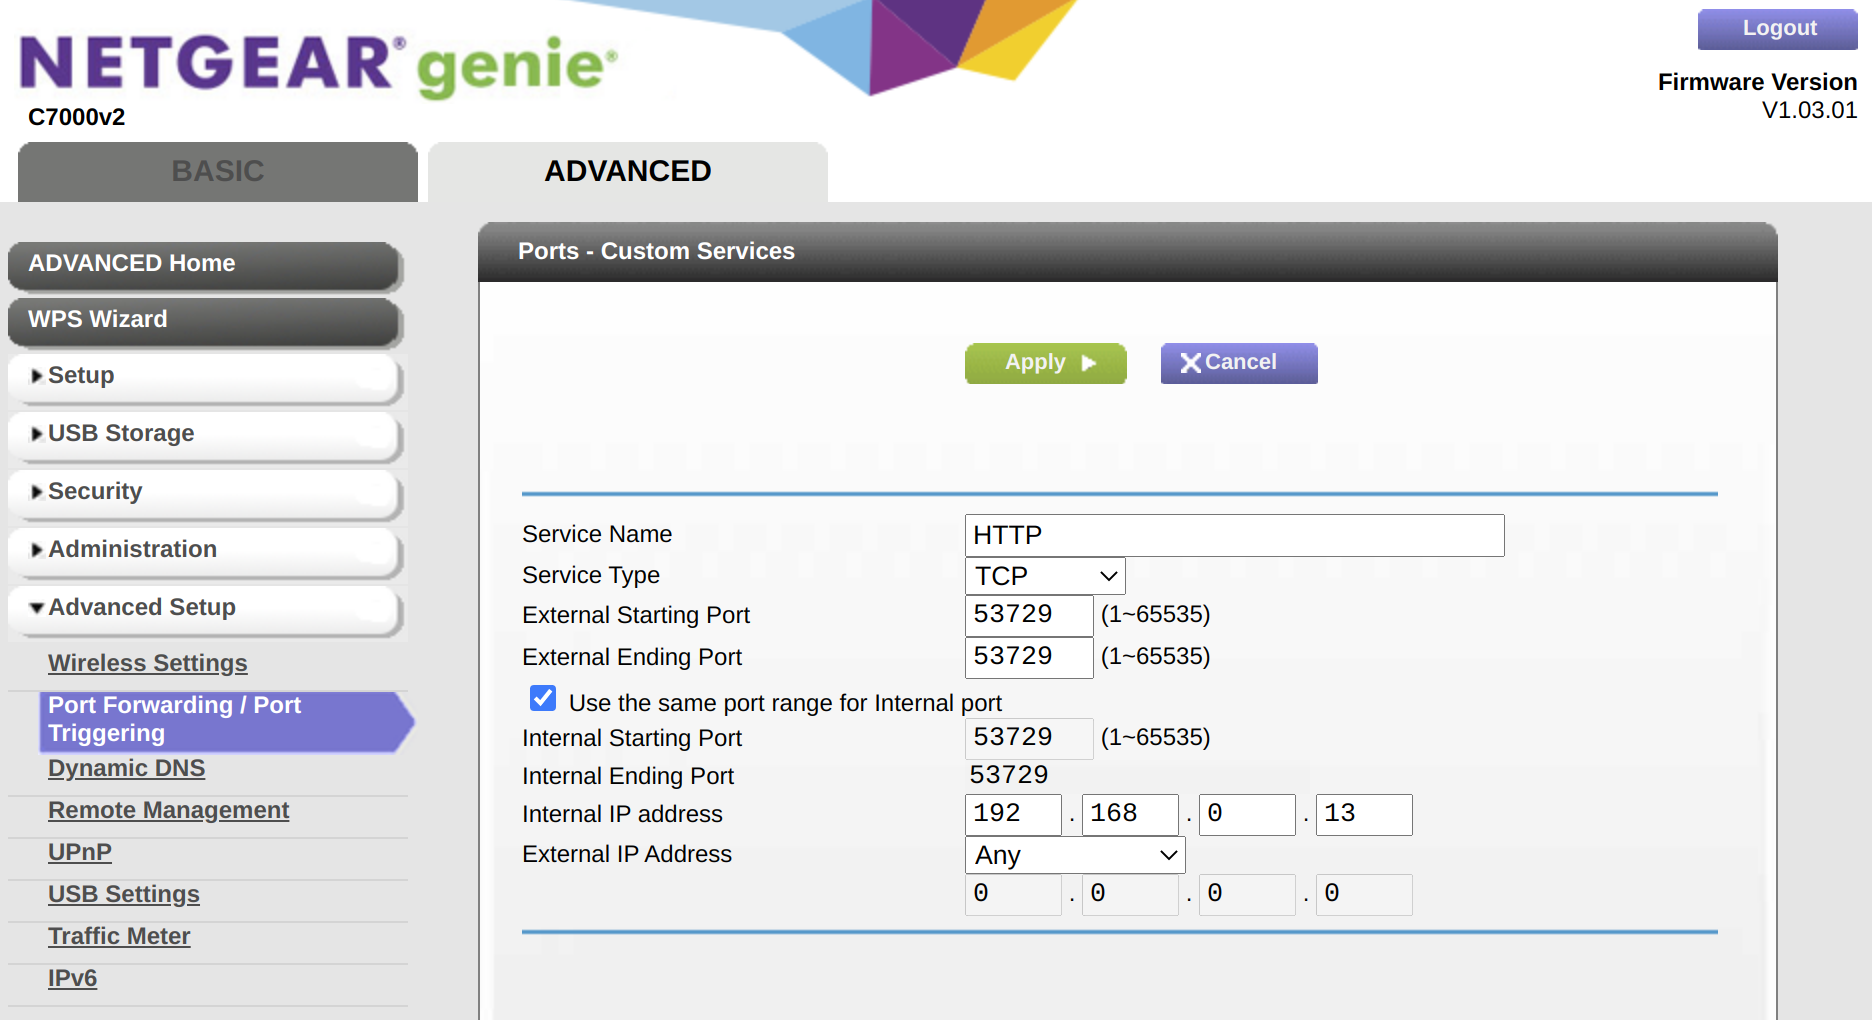
The IP for my arm64 device could be queried using ifconfig command. In my case, it is 192.168.0.13. Then we login to the router control panel, which is usually located at 192.168.0.1, and set up the port forwarding service using the IP and port information.

Connect With Server
We could query our public IP address using a lot of websites, such as WhatIsMyIP. With the public IPv4 address xxx.xxx.xxx.xxx, we go to xxx.xxx.xxx.xxx:53729 in a browser (from your 4G/5G cell phone). We should be able to see the same information as we have seen from our local host.
Caveats
Depending on the geographic locations, from my observations, sometimes connecting with the server that uses dynamic IPs will fail.
In addition, I also found that for my arm64 device, if it is connecting with the router wirelessly, sometimes the connection with the server is not stable. So it might be a good idea to use a ethernet cable to connect.
Hosting Server at Home Using Dynamic IP