Setting Up Remote Development Using Custom Template On Runpod
Introduction
Runpod is a popular cloud computing platform that provides on-demand GPU instances, from the older Ampere GPUs to the later and the latest Hopper and Blackwell GPUs. It is not only useful for deploying services in large scale, but also a great platform for remote development using GPUs.
In this blog post, I would like to share how to set up remote development environment using custom template (custom Docker image) on Runpod and some of its caveats.
Configure SSH Access Using Custom Template
SSH access has to be configured in the custom template in order for IDE to access the RunPod pod instance. The procedures have been formally documented in the Runpod documentation “Connect to a Pod with SSH”.
Create New Template
New custom templates can be created in user’s RunPod Console under the “Manage/My Templates” tab.
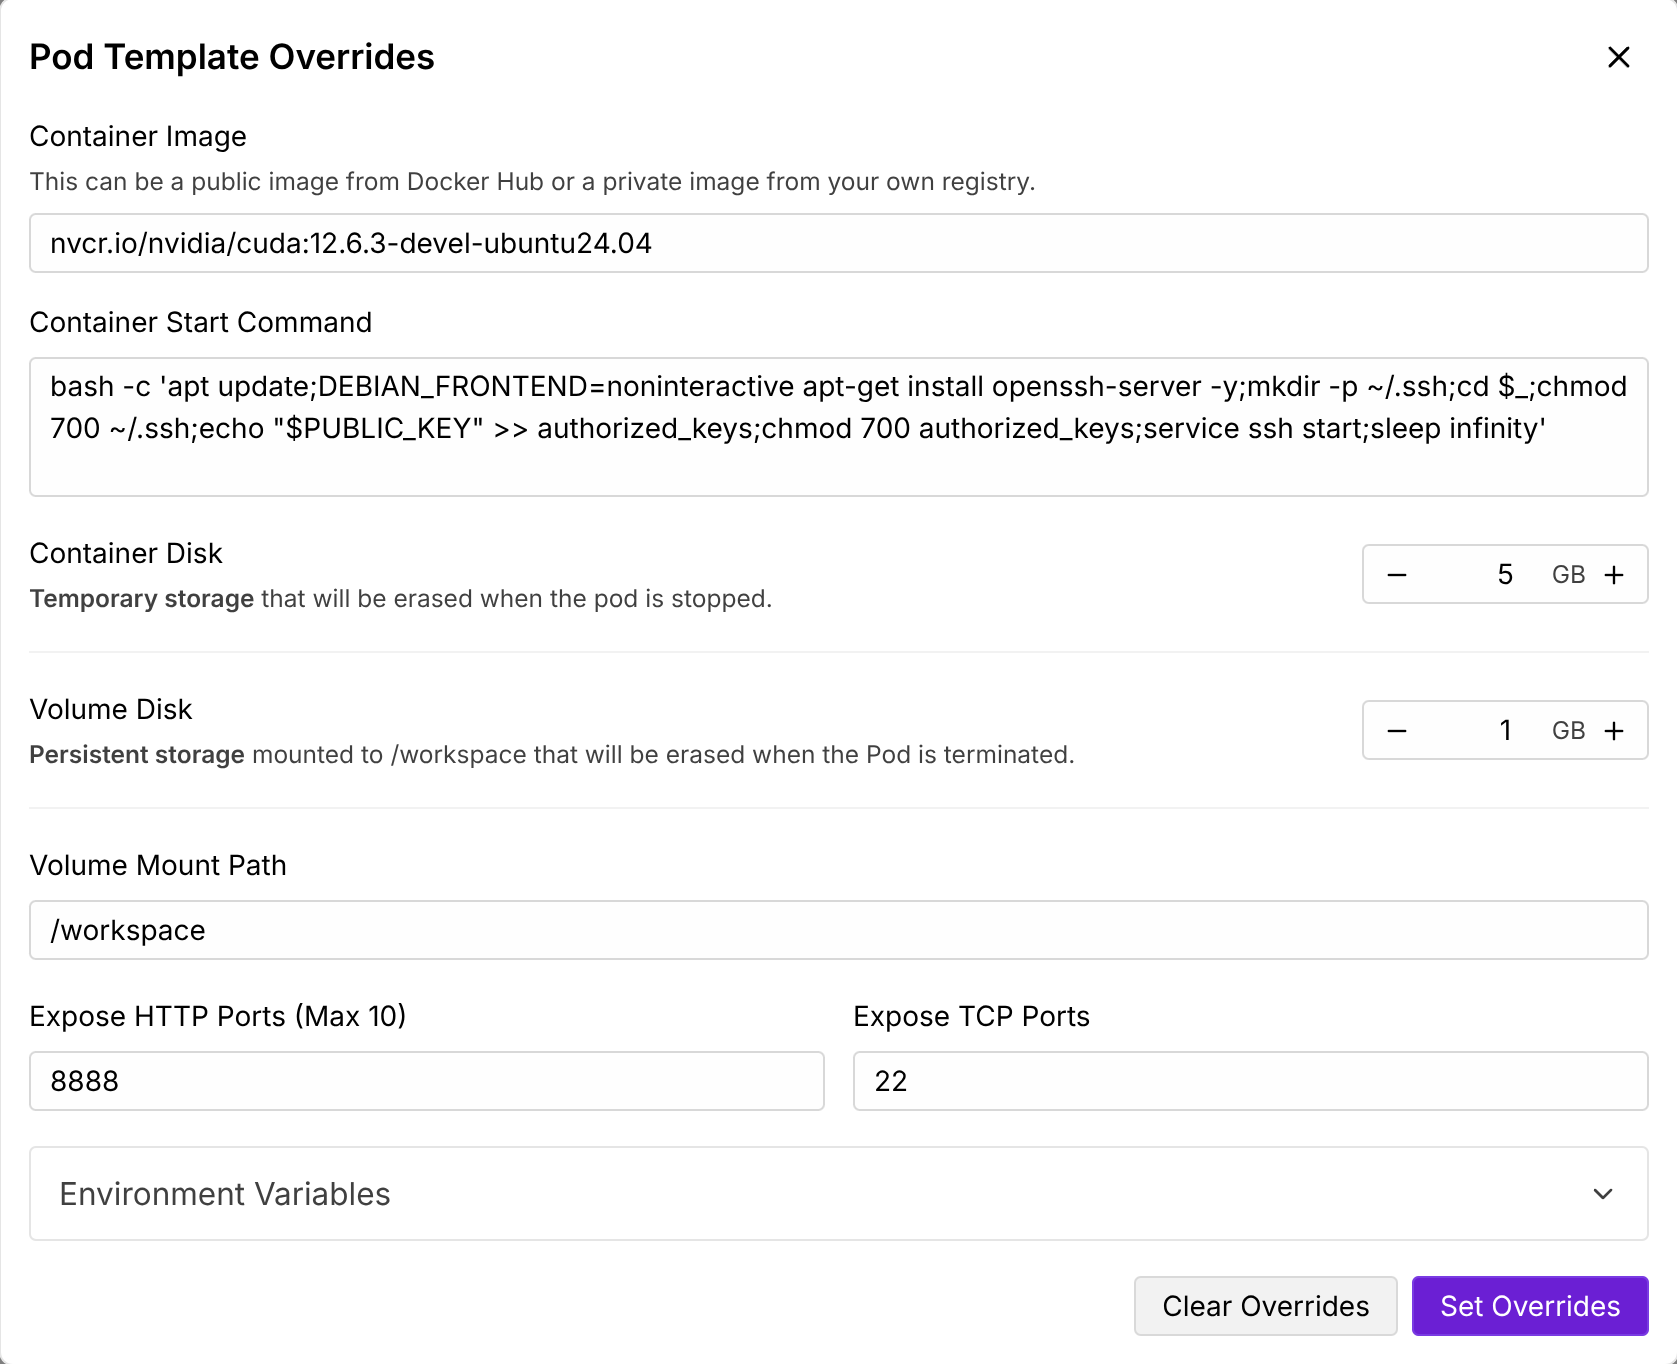
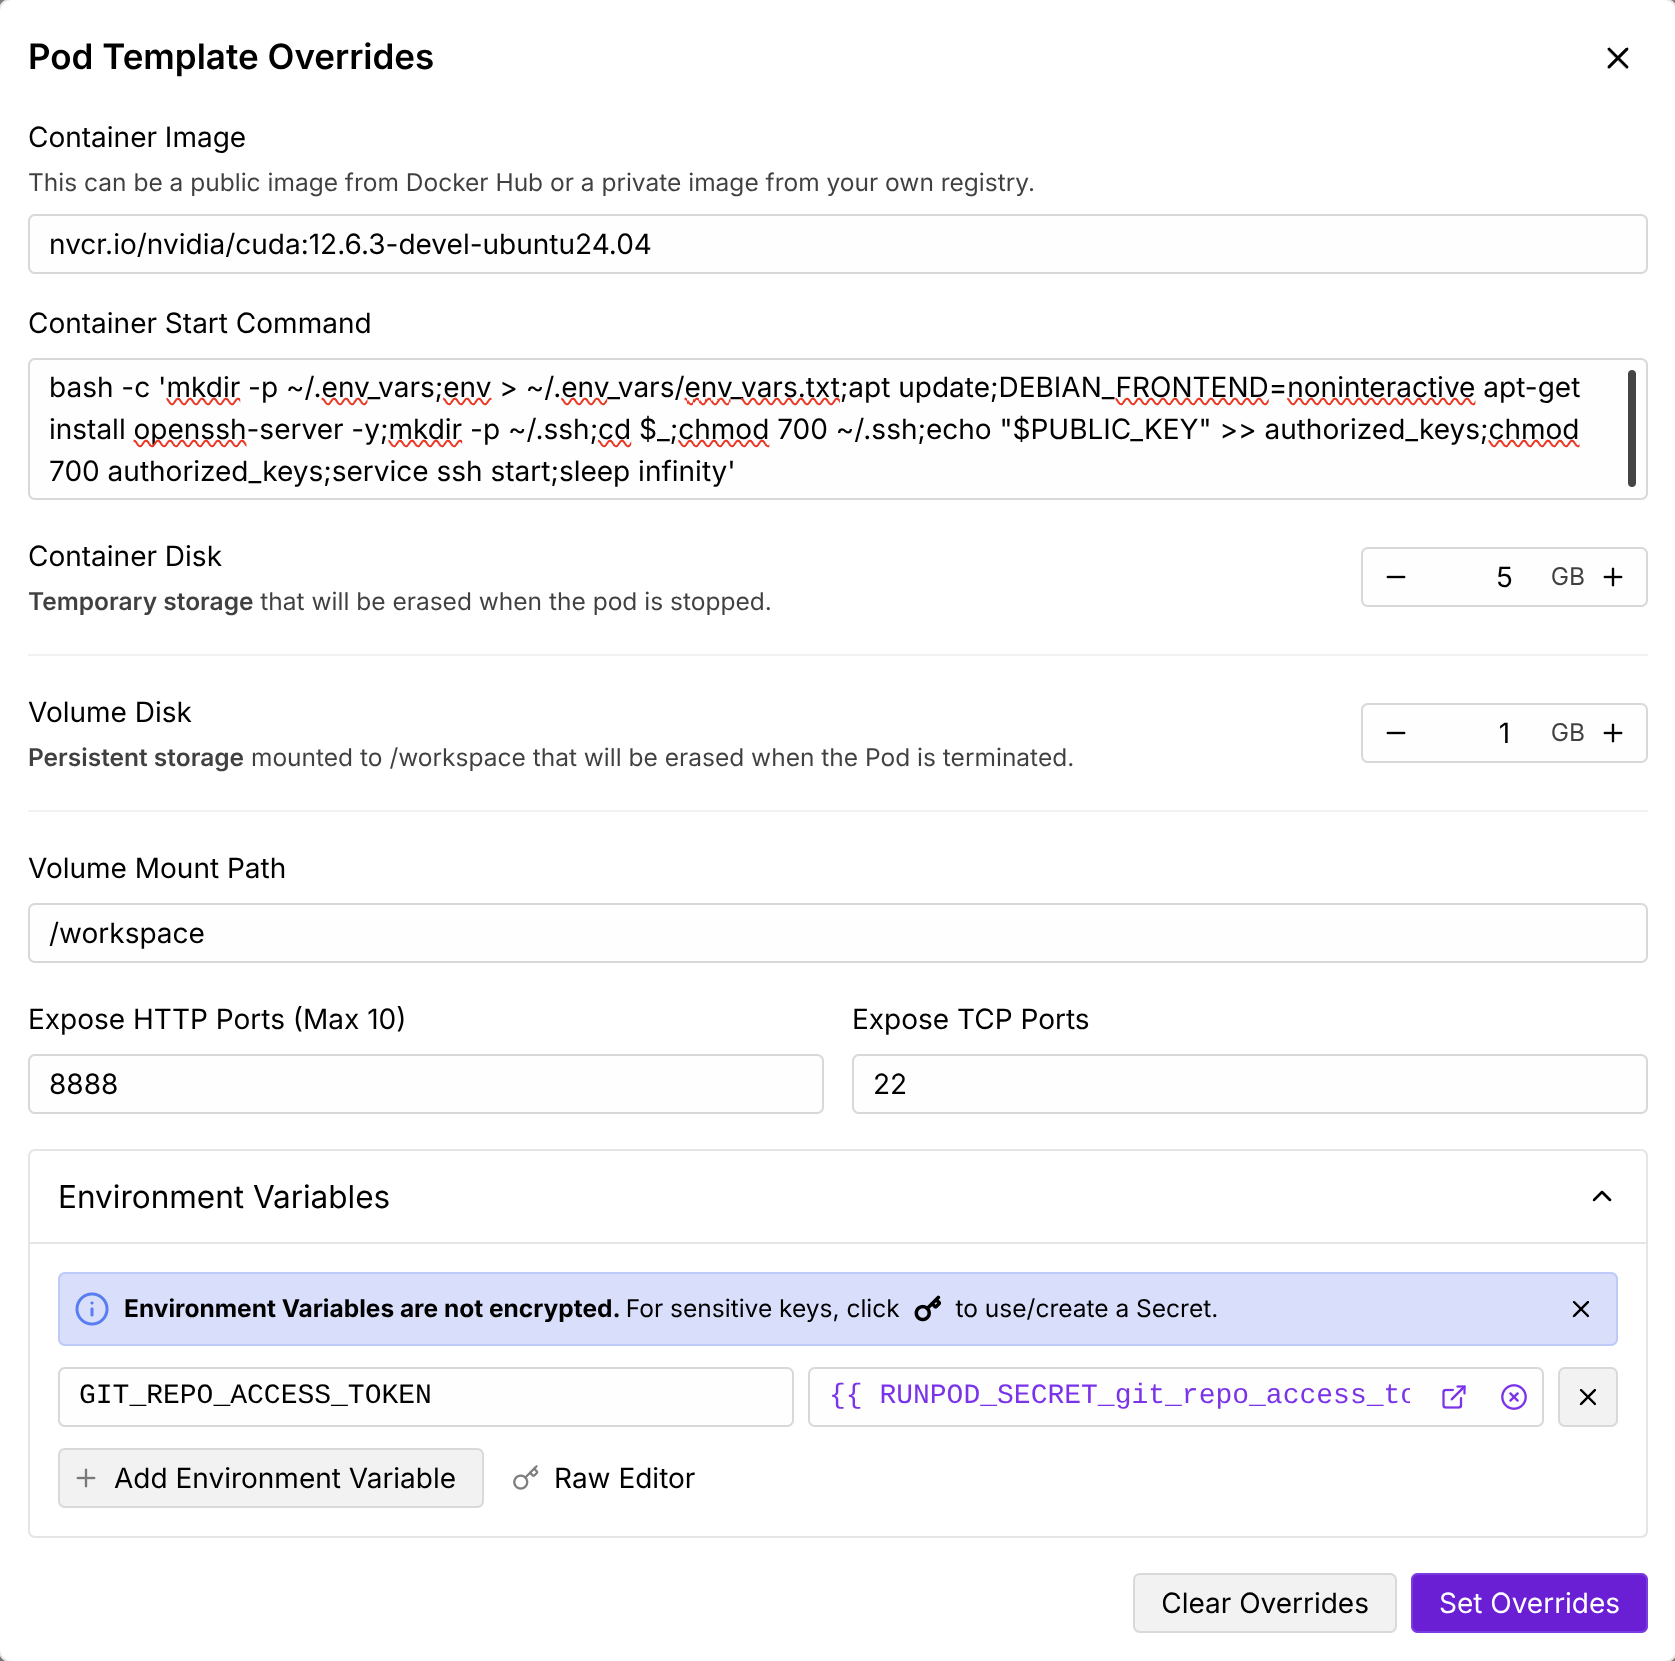
Our final custom template that allows SSH and IDE access would look like this in the following figure.
Docker Image
The Docker images I commonly used are usually prepared by NVIDIA and they are hosted on NVIDIA NGC. In this example, more specifically, I am using the CUDA Ubuntu 24.04 development image nvcr.io/nvidia/cuda:12.6.3-devel-ubuntu24.04. The users are free to choose any Debian/Ubuntu based Docker image that fits their needs. But please do note that Runpod platforms might not always have the latest GPU drivers to support all the latest NVIDIA Docker images that run the latest version of CUDA runtime.
TCP Port
The TCP port for SSH access is 22 and it must be turned on in the custom template.
SSH Daemon
Most custom templates do not have SSH daemon installed and configured. We could configure all of these in “Container Start Command” section of the custom template.
1 | bash -c 'apt update;DEBIAN_FRONTEND=noninteractive apt-get install openssh-server -y;mkdir -p ~/.ssh;cd $_;chmod 700 ~/.ssh;echo "$PUBLIC_KEY" >> authorized_keys;chmod 700 authorized_keys;service ssh start;sleep infinity' |
If we already have a custom start command, replace sleep infinity at the end of our command with the previous one.
If the SSH daemon is not configured properly, we would not be able to access the RunPod instance via SSH.
Note that because this run a couple of apt commands after the container starts, the pod instance will take a bit longer to be SSH accessible after the pod instance is launched.
Access RunPod Instance Via IDE
Once the custom template is created, we can create a new pod instance using the template. The pod instance should be accessible via SSH and IDEs such as VSCode and Cursor. The procedures have been formally documented in the Runpod documentation “Connect to a Pod with VSCode or Cursor”.
Configure SSH Keys On Local Machine
The SSH key pair has to be generated on our local machine and added to our Runpod account. This step is somewhat straightforward for users who have been using SSH and Git. A more detailed description can be found in the “Generate an SSH key” section.
Configure Pod Deployment
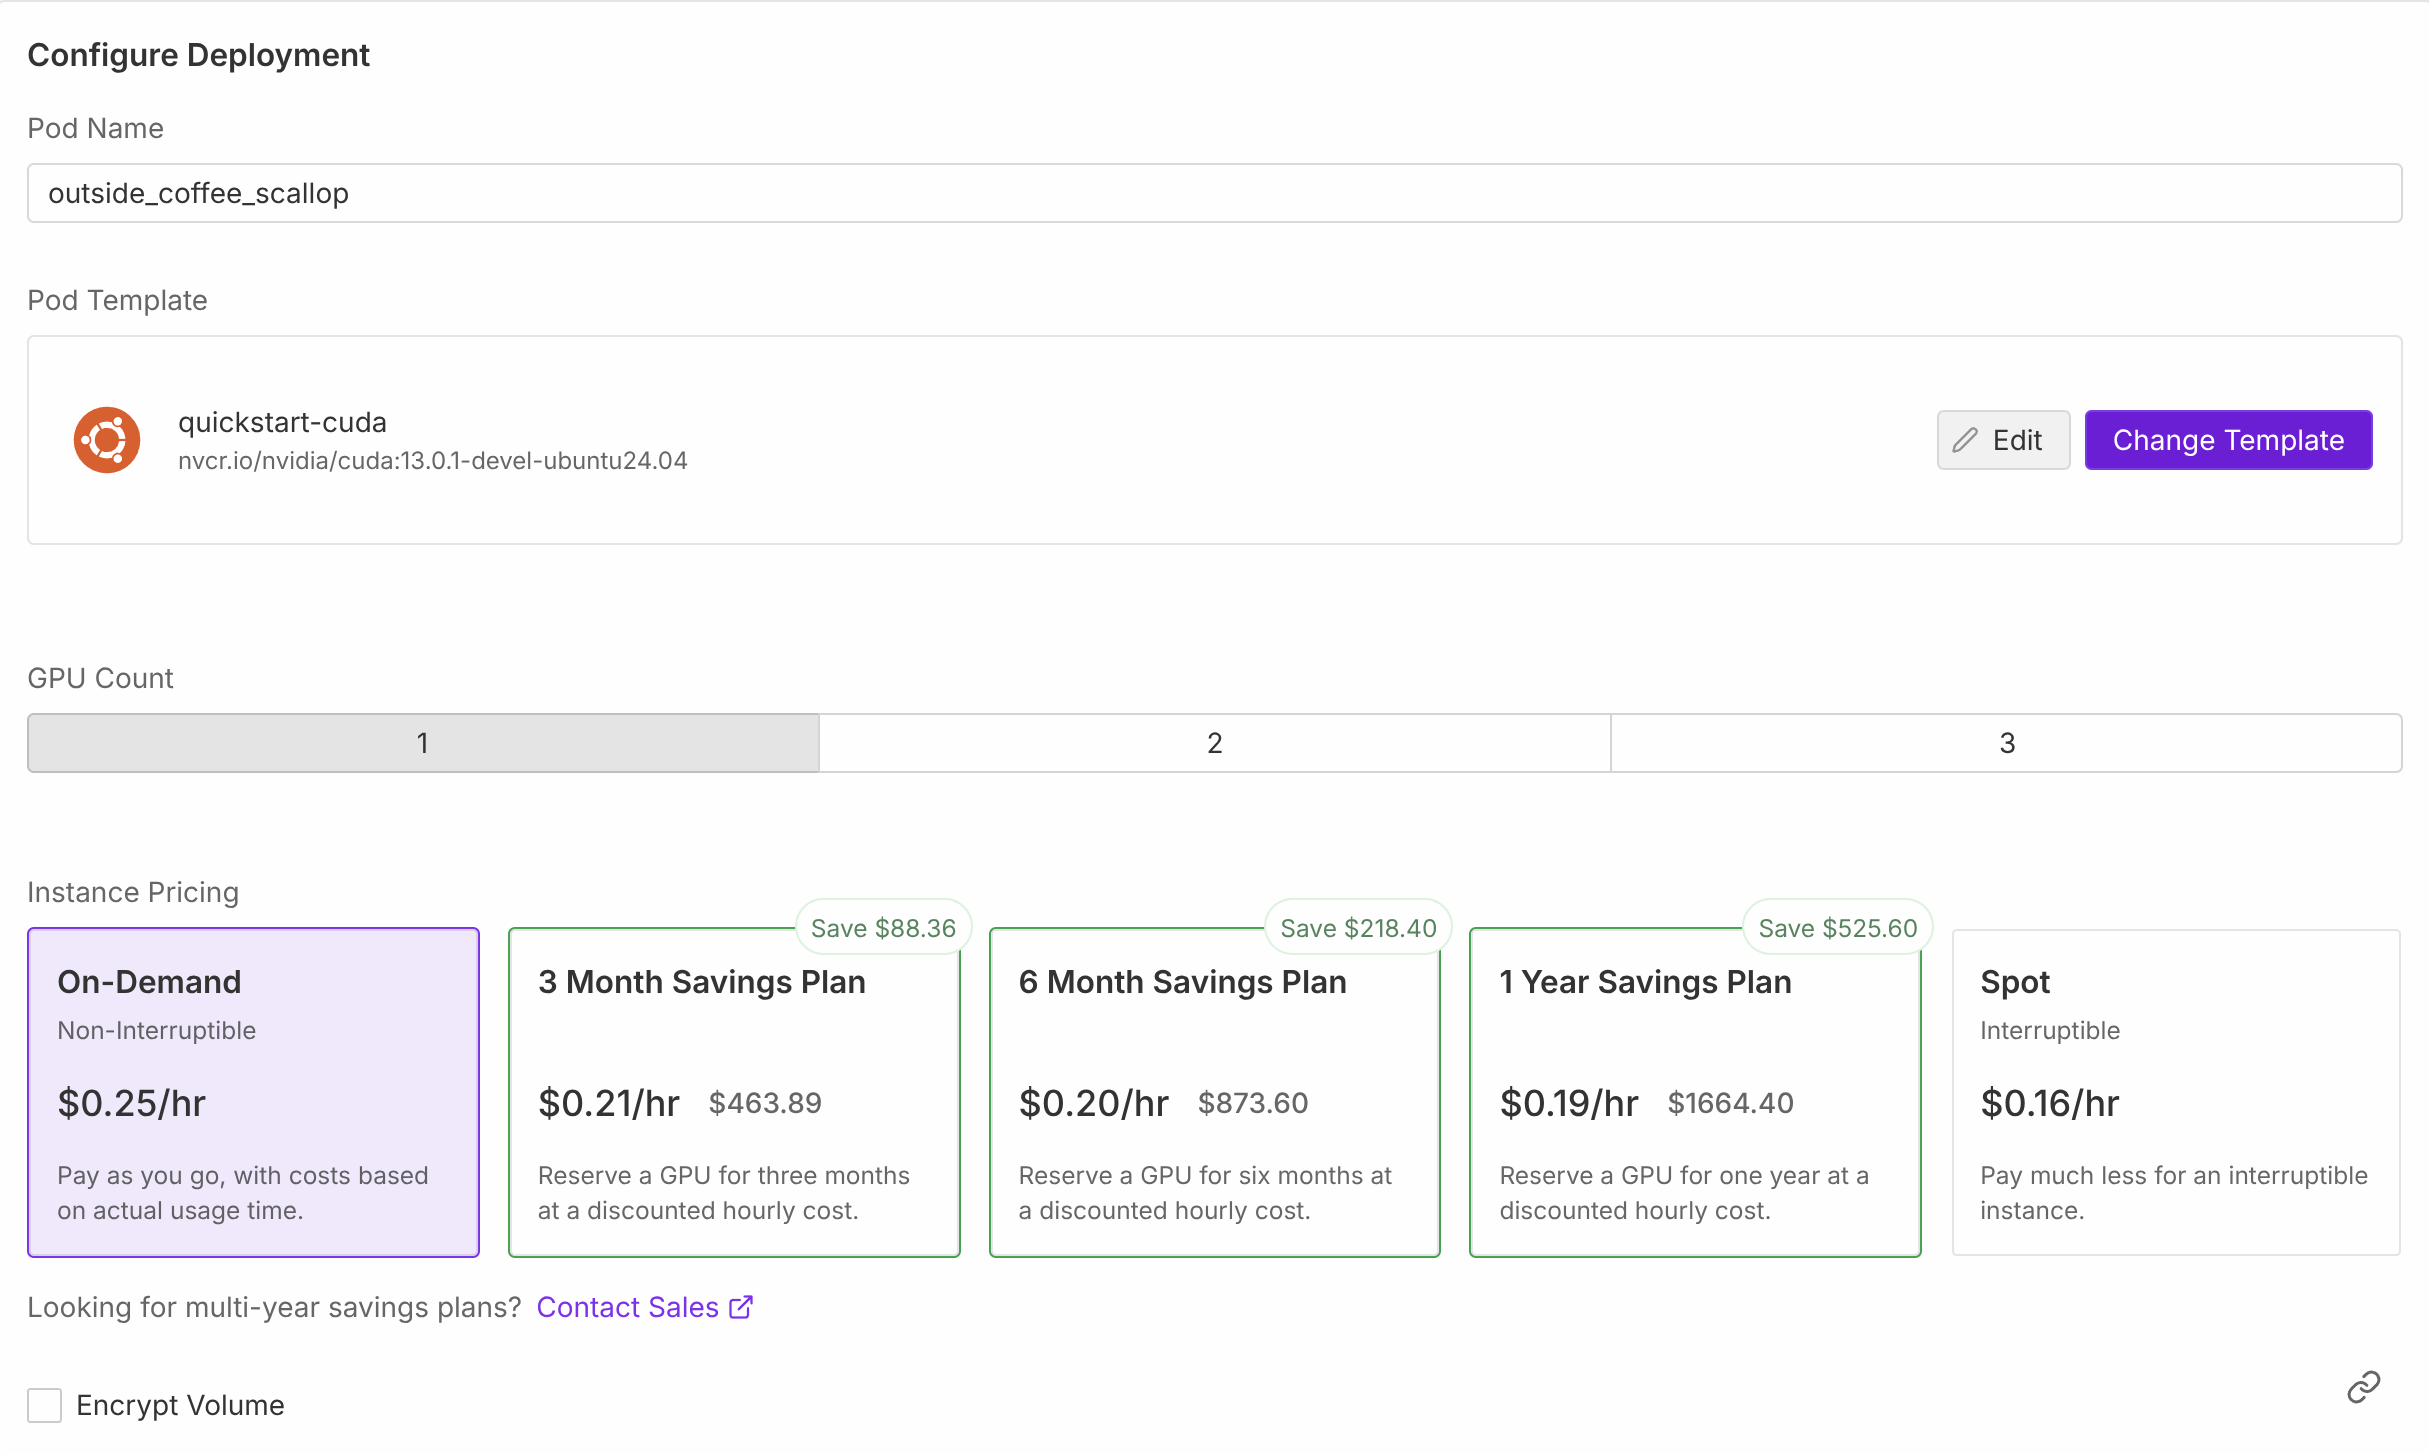
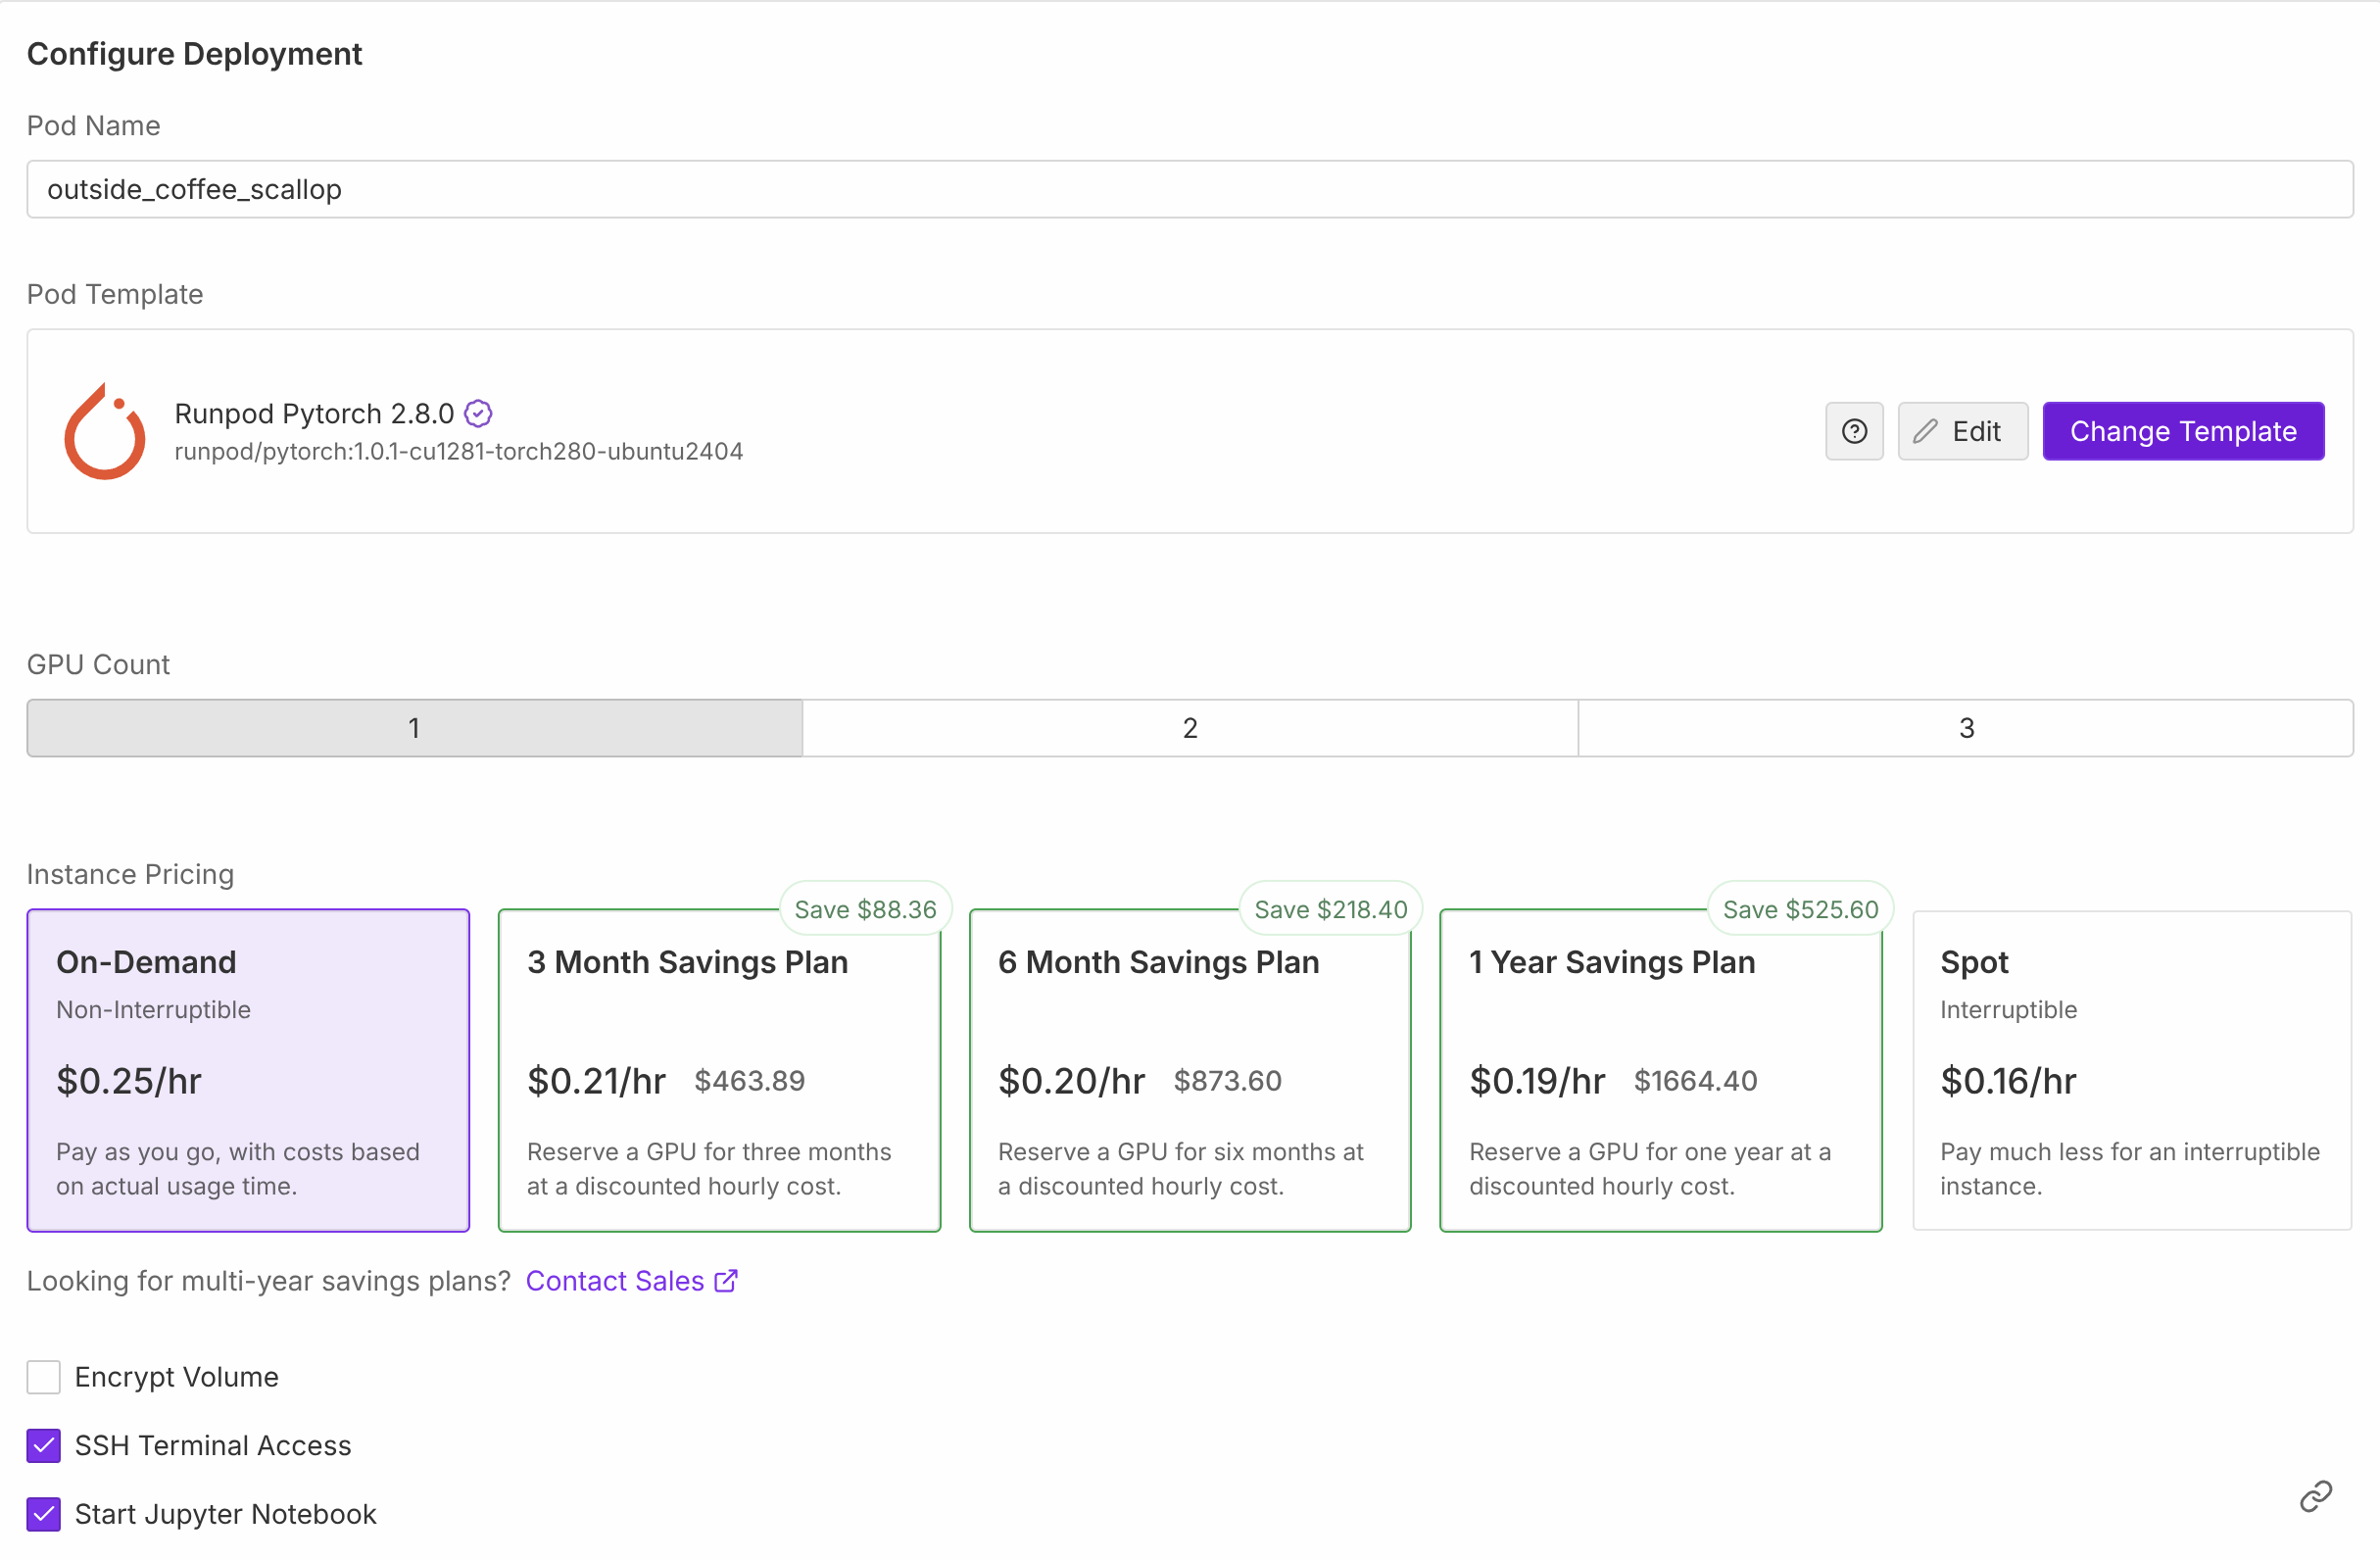
We could select GPU instance and launch the pod using the custom template we created. One key difference from the Runpod official template is that there is no “SSH Terminal Access” option in the deployment configurations. But this will not prevent us from accessing the pod instance via SSH and IDEs.
Full SSH Access Over TCP To Pod Instance
Once the pod instance has been successfully launched, we could find the pod access information easily.
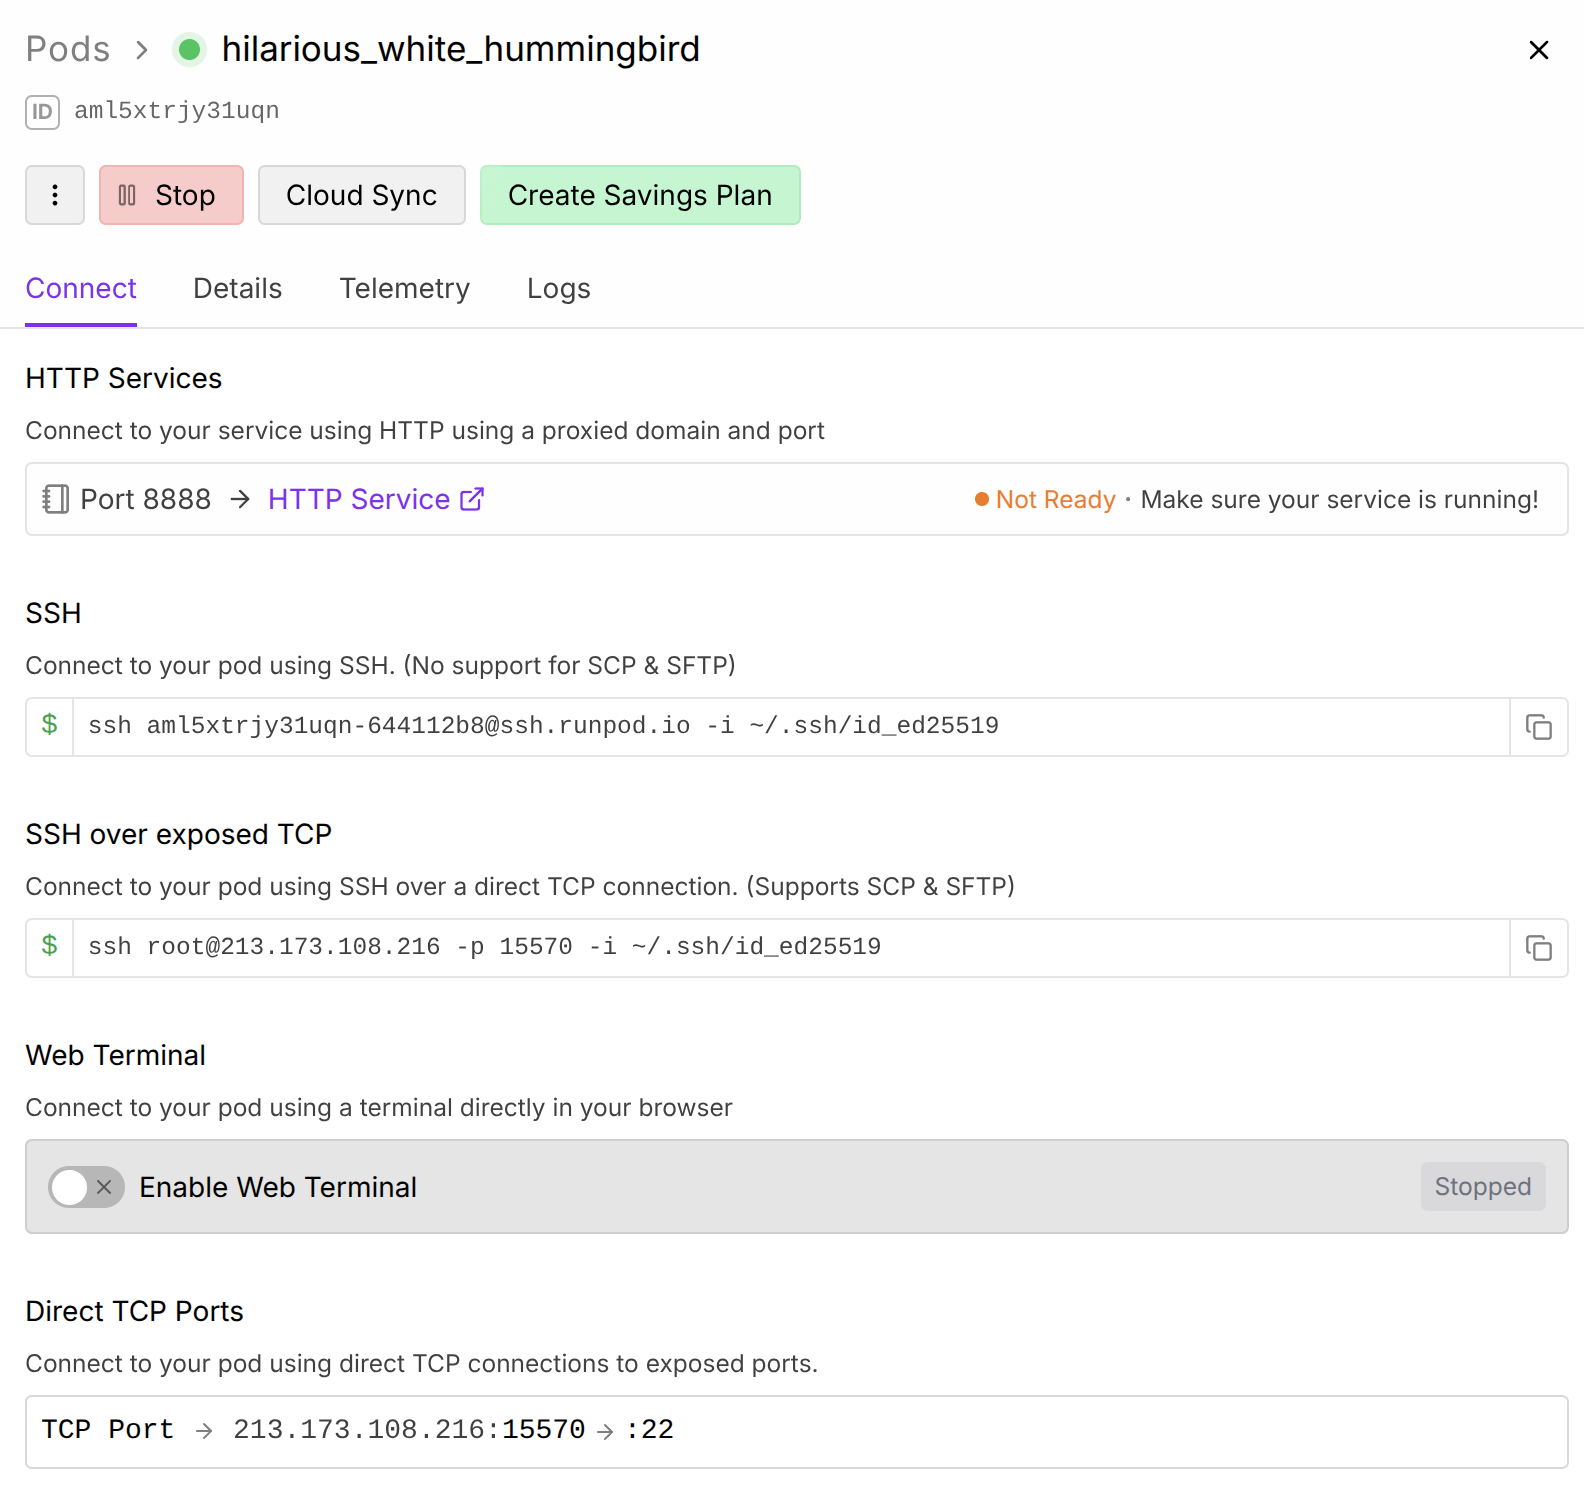
In our case, the SSH over exposed TCP information is what we need for SSH and IDE access.
We could just use the SSH command provided in the SSH over exposed TCP section to access the pod instance terminal via SSH.
1 | $ ssh root@213.173.108.216 -p 15570 -i ~/.ssh/id_ed25519 |
IDE Access To Pod Instance
It should be noted that running Remote-SSH: Connect to Host via user@host in VSCode or Cursor will not work. We have to configure the SSH access for IDE first by strictly following the Step 4 and 5 in the “Connect to a Pod with VSCode or Cursor” Runpod documentation.
In IDEs, we will just have to open the Command Palette (Ctrl+Shift+P or Cmd+Shift+P) and choose Remote-SSH: Connect to Host, then select Add New SSH Host. Enter the copied SSH command ssh root@213.173.108.216 -p 15570 -i ~/.ssh/id_ed25519 and press Enter. The IDE will parse the SSH command and add a new entry to the SSH config file.
To verify the IDE access and CUDA functionality, we created a new CUDA program file test.cu via IDE, compiled it using nvcc and ran the program on the RunPod instance.
1 |
|
1 | root@aef7eede715c:~# /usr/local/cuda-12.6/bin/nvcc test.cu -o test |
Sometimes, if the CUDA version of the platform, i.e., the driver, is lower than the CUDA version of the container, i.e., the runtime, we might encounter compile-time or run-time errors. Please make sure we check this if weird errors occur.
Set Up Git Access
The remote development setup is not complete without having access to Git repositories. Copying SSH public and private keys to the RunPod instance for accessing Git is not safe. Instead, we will generate GitHub fine-grained personal access tokens to specific GitHub repositories with certain configured permissions and use the tokens to access the repositories. The GitHub fine-grained personal access tokens can be saved to Runpod secrets safely as it is encrypted. In our case, we could save the GitHub personal access token to a secret named GIT_REPO_ACCESS_TOKEN.
Accessing the secret environment variables in the pod instance connected via full SSH over TCP is problematic as of today because of a Runpod platform issue. However, we have a workaround by saving the secret environment variables to a file inside the pod instance and sourcing the file to load the environment variables.
After applying the workaround, the environment variable GIT_REPO_ACCESS_TOKEN becomes visible in the full SSH session over TCP.
1 | while IFS= read -r line; do |
To use the GitHub personal access token to access Git repositories, we could just change the remote URL of the Git repository to include the token as follows.
1 | $ git remote set-url origin https://${GIT_USERNAME}:${GIT_REPO_ACCESS_TOKEN}@github.com/${GIT_USERNAME}/${GIT_REPO_NAME}.git |
Runpod Referral
There is no free tier on Runpod and running anything will cost credit. However, if the first-time users sign up using my referral link, they will get some credit to try out the platform for free.
References
Setting Up Remote Development Using Custom Template On Runpod
https://leimao.github.io/blog/Setting-Up-Remote-Development-Custom-Template-Runpod/