Host Applications on Heroku
Introduction
There are a couple of cloud service providers on the market, some of which are well known, such as Google Cloud Platform (GCP) and Amazon Web Service (AWS). I personally use Google Cloud more often and I pay a few hundred dollars per year on Google Cloud to host a few of my simple web applications.
Most of the cloud service providers offer different kinds of “free” services. For example, GCP offers Google Cloud Free Program which allows the new users to have a 90-day trial period that includes $300 in free Cloud Billing credits, AWS also offers Free Cloud Computing Services for new users for 12 months on some low-tier services. In principle, a user could register as many accounts as possible to use the cloud service for free forever, but personally I just don’t like that. PythonAnywhere also allows a user to host a Python web application for free with restricted computing resource and bandwidth. However, it requires renewing the application every one month if I remember it correctly and it does not even support Docker container.
Of course, I have not explored the free services from all the cloud service providers on the market, but my impression about the free services from the cloud service providers is that they are limited and inconvenient. That’s why I am paying Google Cloud to host my web applications.

Recently, I found a new cloud service provider, Heroku, a Salesforce subsidiary, that provides free cloud services. Surprisingly, it has been around for a while and I had never heard of it. Its user experience is close to GCP and it allows the new user to have certain a mount of free service monthly forever without having to manually renew or create a new account. This is something that I have been looking for. So in this blog post, I would like to briefly talk about hosting web applications on Heroku.
Heroku Free Services
Similar to GCP and AWS, Heroku’s free services include web application hosting and data storage.

Dyno Hour
Dyno hour is unit for measuring how much you used the Heroku service.
According to the Heroku free dyno hour instruction,
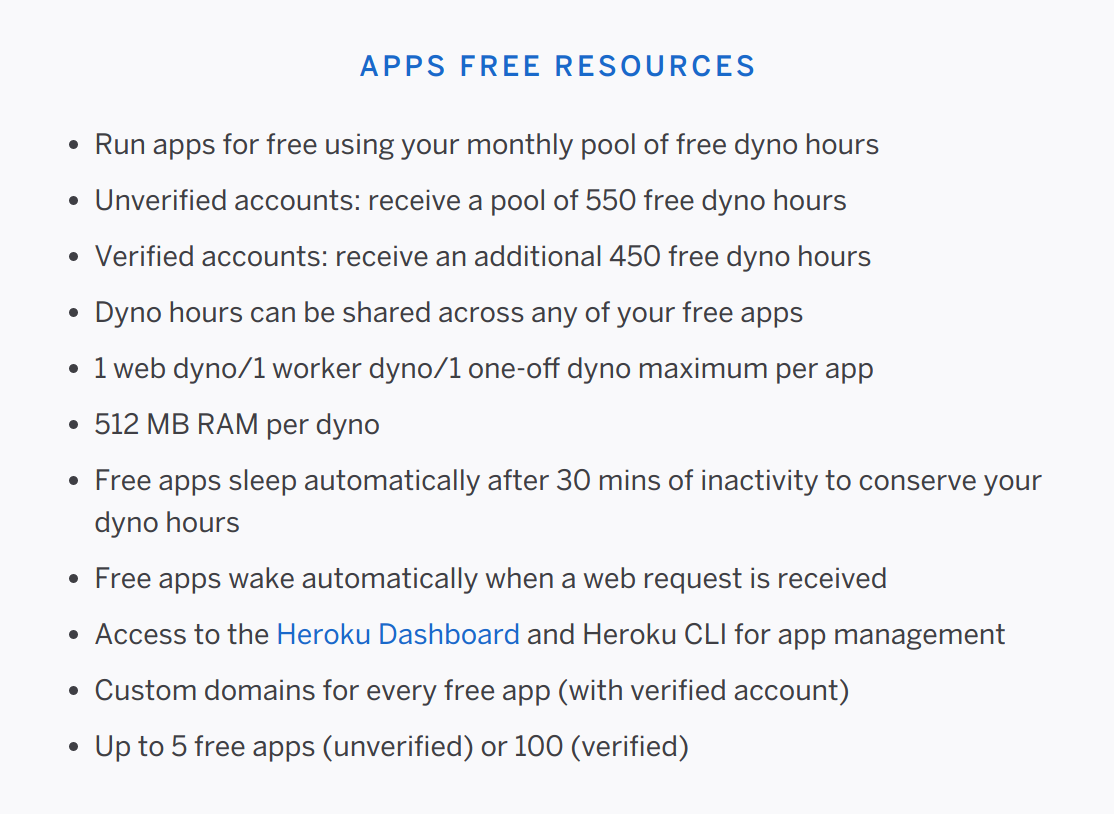
Personal accounts are given a base of 550 free dyno hours each month. In addition to these base hours, accounts which verify with a credit card will receive an additional 450 hours added to the monthly free dyno quota. This means you can receive a total of 1000 free dyno hours per month, if you verify your account with a credit card.
If we are only using the low-tier service which will only use one or two low-tier CPUs, the 500 - 1000 free dyno hours will just be sufficient for running a simple web application 24/7 for free in a month. Every month, the free dyno hours get renewed automatically.
Dyno Sleeping
Dyno sleeping is also a good feature, especially for free users.
According to the Heroku dyno sleeping instruction,
If an app has a free web dyno, and that dyno receives no web traffic in a 30-minute period, it will sleep. In addition to the web dyno sleeping, the worker dyno (if present) will also sleep.
Free web dynos do not consume free dyno hours while sleeping.
If a sleeping web dyno receives web traffic, it will become active again after a short delay (assuming your account has free dyno hours available).
It’s very common for users like me who have a couple simple web applications which are not visited by public users very often. With the dyno sleeping feature, hosting them on Heroku for free becomes an excellent choice.
Heroku Docker App Hosting Example
To demonstrate that Heroku is straightforward to use, I prepared a Heroku Docker hello-world example. In fact, the example is just the Google Cloud Run official hello-world example with an additional Heroku configuration file.
Hosting applications on the stateless Google Cloud Run does not require any configuration file. The additional configuration file for Heroku heroku.yml is as follows.
1 | # For Heroku App deployment. |
The run command is simply a copy of the CMD from the Dockerfile. Although it seems to be a duplication, without it in the configuration, the Heroku application could not be hosted correctly.
In fact, hosting this application on Google App Engine, which supports stateful applications, also requires a configuration file app.yaml. So in this case, we could create a web application that could be hosted on both GCP and Heroku.
The hosting process involves using git and I am listing the procedures below.
Create Heroku App
Create a Heroku app called “hello-underworld”. The app URL will be https://hello-underworld.herokuapp.com/. I am not sure if Heroku supports custom domain. Even if it doesn’t, I think I am fine with it for most of my personal applications.
Install the Heroku CLI
Download and install the Heroku CLI. Unlike Google Cloud CLI, installing Heroku CLI is very quick.
If you haven’t already, log in to your Heroku account and follow the prompts to create a new SSH public key.
1 | $ heroku login |
Create a New Git Repository
Initialize a git repository in a new or existing directory.
1 | $ git init |
Deploy Your Application
Commit your code to the repository and deploy it to Heroku using Git.
1 | $ git add . |
View Heroku App
View the Heroku App at https://hello-underworld.herokuapp.com/.
References
Host Applications on Heroku